WD Passport – DML file extension – Encrypted files?

Problem: Copied all data from source PC to the Passport, then deleted the data from the source PC. When the Passport was next connected to the source PC it synced and deleted the data from Passport as well.

A lot of deleted data from the Passport have been recovered; however, the data in terms of file names and reported size but they are all .DML files. They cannot be opened by conventional methods or by changing the file ext. Is this a proprietary WD encryption format?

Solution: First things first: If you thought you had a secure backup of your data on a WD Passport and you plugged it into a computer that crashed/fried/etc. and planned to copy your lost files to your fixed-up PC from your WD Passport and found yourself (as another blogger said somewhere) like a deer in the headlights as you watched in horror as the WDSync software automatically started syncing your newly blank internal drive (or empty folders on your internal drive) and the Passport, thus “removing” all your “backed up” files from your Passport, you are not alone (and you’re not stupid).

DO NOT save ANYTHING to the Passport. The files are not gone yet because they have not been overwritten. They are “deleted” files, which typically could be recovered with some free recovery software from download.com, but alas, they are also encrypted, so just recovering them won’t help you. You also have to decrypt them (DMailer uses AES 128-bit encryption).

If you are computer savvy…you should realize that the WDSync software is not backup software and is, in fact, just syncing software. So, if you delete something from your desktop it will delete it from the Passport as well, next time you sync. However, EVEN IF you are computer savvy, you probably wouldn’t have guessed in a million years that DMailer would make “autosync” the default setting and that they wouldn’t tell you ahead of time or prompt you in some way before it started deleting files. So, if you want to use WDSync to sync your data between your computer and your Passport, before you do anything else, SHUT OFF autosync and always manually sync. If you are not interested in syncing your data and just want to backup your data, skip the WDSync software all together. Don’t use it. Just use the Passport like a jump drive and drag and drop your files to it. Your data won’t be encrypted or password protected, but download.com offers a number of downloads that will do this for you (specifically for external drives, jump drives, etc.).

If you are not computer savvy…don’t use the WD Sync software. Do what I just said. Drag and drop your files to the WD Passport as if it were just a jump drive. This way your data are backed up and you can delete whatever you want from wherever you want without worrying about all your data suddenly vanishing.

The headlights for the precious files disappear:

(1) Again, DO NOT save anything to the WD Passport after this happens or your files could be gone for good.

(2) Email DMailer (the company that makes WDSync software for Western Digital). Do NOT contact Western Digital, they will just tell you are screwed. WD’s customer support is awful. Go to http://www.dmailer.com and tell DMailer you just accidentally removed encrypted files from your passport that you need to recover.

(3) Just for kicks, ran some recovery software and turned up a lot of .dml files, but you shouldn’t have to use recovery software if you haven’t overwritten your files. Double click on the Passport icon to open the drive. Find the “WD Sync Data” folder. Open the folder for the computer you accidentally synced to (e.g., “office computer”). Open the “Data” folder. There you should find the .option file, the data base file and a folder containing the “deposited” files from the latest sync. In the Sync deposit folder are more folders which should contain the DMailer files (.dml).

(4) Wait for DMailer to get back to you with their data recovery tool.

Read More

How you should deal with the hard disk which contains important data

If you have problems with a hard disk which contains important (valuable) data:

* any kind of manipulation with the hard disk or with software could hinder data retrieval or could cause an enormous increase of the retrieval costs.

* do not use any software, even if some guys (internet) told you to do so

* do not run chkdsk or defragmentation, even if you are told to do so

* do not open a hard disk if you don’t have the knowledge, training and the tools (even then you may expect to lose the data)

* contact a (local) DR company; supply them with complete information

* perhaps some data recovery forum could guide you to find the right Data Recovery company

Four solutions for you:
1. you are the typical user who knows all better than a pro – then try DIY – it’s your data

2. you store your hdd in a safe place for some time – until you got the money

3. you put the hdd into the garbage – you will stay poor and won’t get enough money

4. you look for a pro – even here in the data recovery forum – get an estimate on “money for data basis”

Read More

How to remove Seagate Momentus 5400.4 password

You can do it with SE_DIV http://sediv2008.narod.ru/Easy1014.rar
Choose Family=Momentus 5400.4
Model=your model
COM=your COM
press Connect and insert power to hdd.
You’ ll see IN COM Shell:
—————–
Reset
4096k x 16 DRAM
CORSAIR – 1_Disk S-00 11-08-07_16:25

Buzz HM SFI
!
(P)SATA Reset
(H)SATA Reset
——————
press Ctrl-Z

You’ ll see
—————-

T>
—————
Go to Read/Write
press button Full Detect
You’ ll see

SPT = 337
remember it.
Go to Read SA
Type System Tracks
Type Checked All
Press Detect

You’ll see
PLEAS READ ALL CAREFULLY BEFOR START:

1) Push button OK.
2) Turn Off Power HDD.
3) Wait HDD speed down until stop one.
Pause during 5-10 seconds.
4) Turn On Power HDD.

Do it!
You’ll see
Vendor Track = F91D
remember it
Go to Read/Write
Type Read Sectors
Begin Track=F91D
Head=0
Begin Sector=6
Sector Count=7
Buffer Adr.=4B0

press Read
and attach your Trk_F91D Hd_0 Sct_6(7).bin

Read More

Resolve O LBA, Seagate 7200.11 BIOS don’t recognize (Part II)

PART 2

If your HDD 7200.11 is not recognize by BIOS,

and after you connect him to COM1 and turn on power if you have this response for any command like:

Rst 0x10M
LED:000000CC FAddr:0025BF67
Ctrl + Z
F3 T>
LED:000000CC FAddr:0025BF67
your drive is busy!

power off your Hdd
slightly unscrew one screw near to motor connection to PCB and put plastic visit card! Or you can remove PCB.
Effect is the same…
power on your hdd,

Ctrl +Z

F3 T>/2
F3 2>
F3 2>Z

Spin Down Complete
Elapsed Time 0.138 msecs
F3 2>

now you put PCB back, or pull visit card
enter this
F3 2>U
Spin Up Complete
Elapsed Time 7.242 seconds
F3 2>

F3 T>/1
F3 1>N1
this is a S.M.A.R.T. erase

after that POWER off HDD, it means that you plug off power to hdd,
power on hdd,
reenter
CTRL+Z on terminal
F3 T>i4,1,22
this is G-list erase

after that POWER off HDD, it means that you plug off power to hdd,
reenter
CTRL+Z on terminal
F3 T>m0,2,2,0,0,0,0,22 Enter

!!!IMPORTANT, don’t turn hdd power off, or comp off, wait about 30 sec to 2 minutes until it finished!!!

then you see something like this.

Max Wr Retries = 00, Max Rd Retries = 00, Max ECC T-Level = 14, Max Certify Rewrite Retries = 00C8 Max retries Wr = 00, Max Rd retries = 00, Max T-ECC Level = 14, Max certify Rewrite retries = 00C8
User Partition Format 10% complete, Zone 00, Pass 00, LBA 00004339, ErrCode 00000080, Elapsed Time 0 mins 05 secs User Partition Format 10% complete, Zone 00, Pass 00, LBA 00004339, ErrCode 00000080, Elapsed Time 0 mins 05 secs
User Partition Format Successful – Elapsed Time 0 mins 05 secs User Partition Successful Format – Elapsed Time 0 mins 05 secs

After that hit

F3 T>/2
and
F3 2>Z
Spin Down Complete
Elapsed Time 3.038 msecs

Turn off power from your HDD, od shutdown your comp.

That’s all!

WARNING: Please do NOT try this if you have valuable data on your drive. Do not blame anyone if something goes wrong. You do it at your own risk. Remember that if something goes wrong, it is extremely unlikely that anyone will be able to help you remotely. One wrong command via terminal could easily result in a completely bricked HDD (I really do mean bricked = no one will be able to recover it, even Seagate).

Read More

Resolve O LBA, Seagate 7200.11 BIOS don’t recognize (Part I)

This tutorial is not for inexperienced users!!! Do NOT POWER OFF YOUR hdd, computer, during it, (EXCEPT IF I SAY SO)and you just to be sure connect your computer to UPS.

First you must have to build serial rs232 converter to TX,RX GND, you can use any data cable from your cell phone from Siemens 35 series custom build data cable buid on this picture with max232. Be sure that you put zener diode 2V7 at the picture..Because you could burn your Tx, Rx, on HDD-s PCB.

So, when you build, get your adapter, connect it to this pins on Seagate drive.
[ ”””””””’| |””””’ ] [ .. ..] —-> Rx.. Tx
You do not need to connect SERIAL-ATA CABEL
open hyper terminal or another type of terminal select Serial port example “COM1”
set bit rate to 38400bps
data bits 8
parity N
stop bits 1

it’s default settings except bps.
plug power to disk and after that you will see on terminal something like this:

PART 1

Rst 0x10M
hit Ctrl + Z to get “prompt”
F3 T>

now, if your BIOS recognize disk but there is 0 LBA,0 capacity

all you need is to hit this command:

F3 T>m0,2,2,0,0,0,0,22 Enter

!!!IMPORTANT, don’t turn hdd power off, or comp off, wait about 30 sec to 2 minutes until it finished!!!

then you see something like this.

Max Wr Retries = 00, Max Rd Retries = 00, Max ECC T-Level = 14, Max Certify Rewrite Retries = 00C8 Max retries Wr = 00, Max Rd retries = 00, Max T-ECC Level = 14, Max certify Rewrite retries = 00C8
User Partition Format 10% complete, Zone 00, Pass 00, LBA 00004339, Err Code 00000080, Elapsed Time 0 minutes 05 seconds User Partition Format 10% complete, Zone 00, Pass 00, LBA 00004339, Err Code 00000080, Elapsed Time 0 minutes 05 seconds
User Partition Format Successful – Elapsed Time 0 minutes 05 seconds User Partition Successful Format – Elapsed Time 0 minutes 05 seconds

After that hit

F3 T>/2
and
F3 2>Z
Spin Down Complete
Elapsed Time 3.038 msecs

Turn off power from your HDD, od shutdown your computer.

WARNING: Please do NOT try this if you have valuable data on your drive. Do not blame anyone if something goes wrong. You do it at your own risk. Remember that if something goes wrong, it is extremely unlikely that anyone will be able to help you remotely. One wrong command via terminal could easily result in a completely bricked HDD (I really do mean bricked = no one will be able to recover it, even Seagate).

WARNING: Please do NOT try this if you have valuable data on your drive. Do not blame anyone if something goes wrong. You do it at your own risk. Remember that if something goes wrong, it is extremely unlikely that anyone will be able to help you remotely. One wrong command via terminal could easily result in a completely bricked HDD (I really do mean bricked = no one will be able to recover it, even Seagate).

Read More

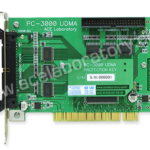
The features of Pirated PC3000 PCI

PC3000 PCIPC3000 PCI version, this Pirated product will not perform or functions:

1). Product will run a while with limited functionality and after a while it will stop working due to DATE/TIME, hard disk with bad sectors, any changes to the G-LIST will make the card unusable.

2). Certain functions will not work properly, often hang or crashes, Hard disk that comes with PC3000 PCI cloned must be Maxtor 4D040H2 or 6Y080L types, imagine these drives have full potential of breaking down, they purposely use these type of HDD so they can sell more pirated PC3000 PCI cloned.

3). Windows operating system in Chinese language so guess what…it will drive you crazy.

4). Hard Disk must be cloned again once the PC3000 PCI is locked due to piracy prevention is detected (e.g. Asking for renew license key), cloning procedure is totally time wasting.

5). If something goes wrong, Chinese seller will deny and ask you to get F##CK!

6). PC3000 PCI is updated regularly meaning that once you bought the pirated ones you can’t update the software. The Chinese will ask you to buy a new one instead. (That’s the trick…they will keep asking to buy a new updated PCI claiming it is better than the previous version, e.g. PC3000 PCI version 1.1, 2.2, 2.XX and so on), after a while they will tell you a new system is added so you don’t have to clone if something goes wrong, guess what? they will ask you to buy a new one again because your old one can’t be updated.

7). Average pirated copy of PC3000 PCI selling for around US$400 – US$600, every few months there is a new version comes out, so you keep spending $600, over the course of 1 year you can buy the new original PC3000 PCI with free updates for 1 year.

8). New original PC3000 PCI can run on any motherboard, Windows Operating systems English or other language, any types of CPU, HDD etc.

Hope this article helps people in deciding whether or not it’s worth buying the clones PC3000.

Read More

Few bad troubles on Seagate Barracuda 7.7200

For example: Seagate Barracuda 7.7200 40Gb. When scan it by MHDD almost all surface looks perfect, but drive have 1 bad block (or little bit more) in first sectors. How to fix the problem?

First rule: if data is important you must save it first, before do any “repair” or you can lose you data in this drive at any moment.

Now, then data saved we can start drive diagnostic. If drive have few bad blocks we can divide situation to the following case:

Universal:

1) software damaged – this is actually not damage, but sectors with incorrect ECC info, simply rewrite sectors to remove trouble.(MHDD erase waits will help)

2) actual damaged – well sometimes surface can be worn and we have actual damage. If we have not very much damage that we can try remap them. Try simple rewrite bad sector (most drives perform remap on write) or use MHDD remap on etc. (then bad sector remapped SMART Reallocated sector count attribute increased )

Seagate 7.7200:

3) head problem – drive firmware detect head problem and switch to “read only” mode. This can be diagnosed by following symptoms:

①. after drive power on, it take long time to become ready (BSY status cleared)

②. drive don’t write if you run MHDD “erase” (not fast erase, but normal erase) everything stopped after MHDD write 765 sectors. (Really nothing wrote at all, if you try writing disk sectors with disk editor, you see what nothing changed)

Such troubles most likely can’t be fixed by MHDD, because they caused by bad head. You should use the head replace tools to fix this problem.

Read More

Most Popular Freeware for HDD Diagnostics (MHDD)

mhddMHDD is the most popular freeware program for low-level HDD diagnostics.

MHDD supports these interfaces: IDE, Serial ATA, and SCSI. Also there is a possibility to access USB storage; there are drivers for emulation (USB->SCSI).

This software can make precise diagnostic of the mechanical part of a drive, view SMART attributes, and perform Low-level format, bad sector repair, different tests and tens of other functions.

More information on: http://hddguru.com/content/en/software/2005.10.02-MHDD/

Read More

Basic Information of Hard Disk Drive (Part III)

Firmware ‘overlay’ code are specific code functions. Why not just put all firmware code into one section? Well, since the RAM in the drive is a limited resource, they’ve put some code into ‘overlay files’, so that this specific code can be swapped into RAM when that specific function is needed. When the function is not needed, it can be swapped out of ram and some other function can be swapped into it again.

The firmware update files from Maxtor (I think the same goes for the other vendors) are not scrambled/encrypted/packed in anyway. In fact, you can find the exact same code in these files also in the ‘*.RPM’ files that PC3K produces for example.

Maxtor distributes their firmware file in a so called “.DMC” file. This DMC file is a package of 4 files, a ‘.Bxx’ file, a ‘.cxx’ file, a ‘.bbr’ file and a ‘.cbr’ file. Like I mentioned, this DMC container is not packed or scrambled in anyway. You can just cut the files out of it. The first 0x150 bytes of this file is the header. This header contains the four filenames, the offsets at which bytes in the package these files can be found, the length of the files and a checksum (not 100% sure about the checksum though). The ‘.bxx’ file is the biggest file and contains the overlay modules. You can find all code overlay modules by looking for ‘MO’ in the file. Right after this 2 byte string, you’ll find the hexadecimal overlay module ID. The ‘.bbr’ file contains the main firmware code. The last 2 files are very small, not sure what they contain, probably some checksums for the firmware and overlay modules.

Like said, the firmware code and overlay modules can also be found in the ‘*.RPM’ files of course, since this represents the firmware code on disk. So, you can look through these RPM files and scan for the ‘MO’ string to find any specific overlay module.

So, in short, if a vendor has released a firmware upload tool (most vendors have), BUT haven’t released a firmware file for your specific drive type, you could create your firmware, if you have the dumped modules (for example, obtained from this site). You could rip the main code and overlay modules and paste them into an existing DMC package. However, since I don’t know the checksum calculation and the meaning of these .cxx and .cbr files (probably checksums), you’d have to do more research, but in theory, it would be possible to create your own firmware files and flash them with such standard Vendor program to disk, so you wouldn’t need to buy an expensive tool like PC3000 (at least not if your sole goal was to upload a new firmware).

Of course, you could also create your own flasher program, instead of using the one supplied by the vendor. However, since vendors use specific versions of the ‘download microcode’ ATA command, you’d have to do research into this.

Furthermore, you could create a program that does EVERYTHING that a tool like PC3000 does. However, like pointed out, you’ll need very detailed information on the vendor specific ATA commands and the structure of the SA for that specific drive type and since this info is not made public by anyone, this means a LOT of work. “But hey, the PC3000 tool features a special hardware PCI card!” Yes, but as you’ll understand by now, you can think of that card as nothing more than a copy protection. They could have perfectly created the tool without it, but I guess they would have sold quite some copies less So you really can’t blame them for it, in fact, I think it’s quite a smart move to stop piracy.

Read More

Basic Information of Hard Disk Drive (Part II)

If a drive has damaged data in the SA, for example in the firmware code module, it might become unusable. To repair these disks, the HDD can be switched to a so called ‘safe mode’, by setting specific jumpers on the drive. If the drive is operating in safe mode, it bypasses its own firmware. Instead, it wants the user to upload firmware to its ram. If the user uploads a correct ‘temporary’ firmware to RAM, it starts executing that firmware. If this uploaded RAM code (the ‘loader’) starts operating, the user can then start to issue ATA commands to the drive to modify the damaged modules.

Firmware files that you can find on a site like this contain a lot of files. First, there is the ‘loader’ file (*.LDR). This file is the ‘temporary’ firmware code, that’s being uploaded to the RAM (so, it’s not being written to disk). Then, there are a lot of ‘*.RPM’ files. These files represent the different modules, which can be written to the SA. The filenames consist of 8 numbers. The first 4 numbers specify the (hex) UBA and the second 4 numbers represent the hexadecimal module size in sectors (each sector normally contains 512 bytes, so for example, if a filename ends in 0002, then that module is 1024 bytes long). So, in short, after uploading the loader to RAM, the user can start replacing damaged modules by overwriting them with correct ones.

BTW, please note that the term ‘firmware’ for the packages on this site is not very well chosen, since these packages contain all needed modules to repair a HDD and not just the firmware (=code) module.

Anyway, if you’re looking for a specific firmware module, you can do 3 things:

1) rip the firmware modules from the SA of an identical HDD
2) get these modules from a friend (or for example, from the files section on this site: www.firmwarebase.com)
3) use a firmware update program from the vendor.

About this last option: firmware updates from vendors are pretty rare, since firmware code almost never needs to be replaced. However, Maxtor for example, had some problems with the firmware code on some Diamondmax HDD models. So, they issued a firmware update. This update consists of 2 files:

1) the executable file that issues the ATA ‘download microcode’ command to upload the firmware files to the HDD
2) The firmware code, consisting of the ‘main’ firmware code and ‘overlay’ code modules.

Read More