A step-by-step guide to formatting an ATA hard drive with a Macintosh operating system(Mac OS).
- Mac OS 8.x thru 9.x
- Mac OS X or 10
Formatting an ATA hard drive in Macintosh operating system 8.X thru 9.X
Step1.
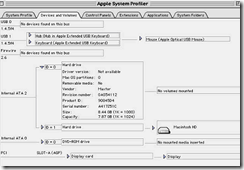
After hooking up the hard drive either boot off the CD or the main Macintosh HD then go to the Apple System Profiler located under the Apple menu. From there go to Devices and Volumes and check to see if the hard drive that is going to be formatted is properly displayed. If the drive is not displayed make sure that the drive is properly installed or connected.
Step 2.
Once the drive is detected and determined to be the one that is to be formatted go to the System Folder, Utilities, Drive Setup, and ‘click’ on the “Drive Setup” icon.

Step 3.
‘Click’ on the drive you want to format then ‘click’ Initialize.

‘Click’ either on Initialize for a single volume format or ‘click’ on Custom Setup to specify type of format, partition, and size. For Custom Setup instructions go to Step 4.

Step 4.
In Custom Setup select the Partition Scheme, the type of format, and the size. Then ‘click’ on OK.

Step 5.
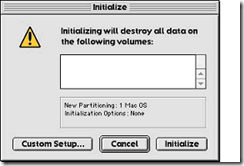
This will then take you to the Initialize screen. ‘Click’ on initialize. After the drive initializes it will be ready for use.
Step 6.
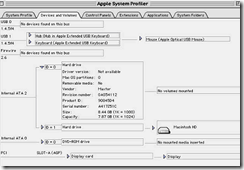
To verify that the system recognizes the correct partitions, size, and format go back to Apple System Profiler and select the Devices and Volumes folder. Check the information from the pull downs.
To format the drive for Mac OS X (Jaguar, Panther and Tiger)
Note: The way in which Mac OS X mounts the hard drive depends on the drive’s capacity.
Step 1. Plug your drive into the Macintosh.
Step 2. Launch the Disk Utility.

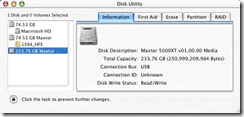
Step 3. Select your new drive from the list on the left. A description of the drive appears in the right window.
Step 4. Select the Partition tab at the top of the window.
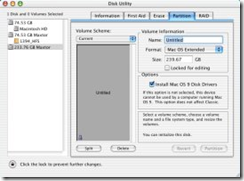
Step 5. You may partition the drive or just keep it to one volume. For each volume:.
- Enter a name for your drive in the. Name field.
- Select the Mac OS Extended from the Volume Format drop-down list.
- Select the check box next to Install Mac OS 9 Drivers. This will allow your disk to be recognized if you start your system with Mac OS 9.
- Click Partition to continue. An alert dialog appears to confirm the Partitioning/Formatting process.

- Click Partition to start the Partitioning/Formatting process.

- When complete, the drive will mount to the Desktop.

