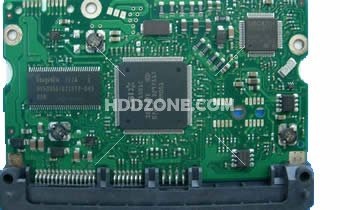
 The BIOS is a program pre-installed on computers (with the exception of Macs) that the computer uses to start up. The CPU accesses the BIOS before the operating system is loaded. The BIOS then checks all your hardware connections and locates all of your devices. If everything is OK, the BIOS loads the operating system into the computer’s memory and finishes the boot-up process.
Some of the most common single key commands are:
F1, F2, ESC and DEL.
Some of the most common key combinations are:
CTRL+ALT+ESC, CTRL+ALT+DEL, or CTRL+ALT+INS.
///////////////////
ALR Advanced Logic Research, Inc. ® PC / PCI //F2
ALR PC non / PCI //CTRL+ALT+ESC
AMD® (Advanced Micro Devices, Inc.) BIOS //F1
AMI (American Megatrends, Inc.) BIOS //DEL
Award™ BIOS //CTRL+ALT+ESC
Award BIOS //DEL
DTK® (Datatech Enterprises Co.) BIOS //ESC
Phoenix™ BIOS //CTRL+ALT+ESC
Phoenix BIOS //CTRL+ALT+S
Phoenix BIOS //CTRL+ALT+INS
Acer® //F1, F2, CTRL+ALT+ESC
ARI® //CTRL+ALT+ESC, CTRL+ALT+DEL
AST® //CTRL+ALT+ESC, CTRL+ALT+DEL
Compaq® 8700 //F10
CompUSA® //DEL
Cybermax® //ESC
Dell 400 //F3, F1
Dell 4400 //F12
Dell Dimension® //F2 or DEL
Dell Inspiron® //F2
Dell Latitude //Fn+F1 (while booted)
Dell Latitude //F2 (on boot)
Dell Optiplex //DEL
Dell Optiplex //F2
Dell Precision™ //F2
eMachine® //DEL , F 2
Gateway® 2000 1440 //F1
Gateway 2000 Solo™ //F2
HP® (Hewlett-Packard) //F1, F2 (Laptop, ESC)
IBM® //F1
E-pro Laptop //F2
IBM PS/2® //CTRL+ALT+INS after CTRL+ALT+DEL
Intel® Tangent //DEL
Micron® //F1, F2, or DEL
Packard Bell® //F1, F2, Del
Seanix //DEL
Sony® VAIO //F2
Sony VAIO //F3
Tiger //DEL
Toshiba® 335 CDS //ESC
Toshiba Protege //ESC
Toshiba Satellite 205 CDS //F1
Toshiba Tecra //ESC then F1 or F2
Fujutsu Manuals & BIOS Manuals & BIOS Download
Lenovo(formerly IBM) Lenovo BIOS Access page
Toshiba Notebook:
1. Turn on computer by Holding down power button while pressing the ESC key.
The machine will beep, then display:
Check System, then press [F1] key.
2. Release ESC key
3. Press F1 key
//////////////////////
Each computer and BIOS manufacturer can use a different key or combination of keys in order to enter the System BIOS. Sometimes during system boot when the screen is blank you will see some text in the bottom middle or bottom right of the screen that will tell you what the key sequence is. If not, you may need to consult your computer manual, or contact the manufacturer of your computer to find out what the key or key combination is.


 The BIOS is a program pre-installed on computers (with the exception of Macs) that the computer uses to start up. The CPU accesses the BIOS before the operating system is loaded. The BIOS then checks all your hardware connections and locates all of your devices. If everything is OK, the BIOS loads the operating system into the computer’s memory and finishes the boot-up process.