How to low-level format a Mac hard drive using Drive Setup?

Low-Level format Mac Hard Drive To low-level format a hard drive using Drive Setup, follow these steps:

  1. Start by selecting the hard drive you wish to low-level format.
  2. Under the Function menu select Initialization Options
  3. Select Low Level Format (a check mark will appear) and click OK.
  4. Click Initialize at the bottom of the main screen.
  5. Again click Initialize.

Drive Setup will low-level format the drive and prepare it for use with the Mac OS, after which it can be loaded with software.

Note:

  • Low-level formatting a hard drive will destroy all data on the drive and destroy any chance of data recovery. We suggest you make a reliable back up of all data before attempting this.
  • Canceling a low-level format of a SCSI hard drive before it has completed can render the drive permanently inoperable.
  • Low-level formatting can take several hours depending on the drive.
Read More

Formatting an Internal or External hard drive using Mac OS

A step-by-step guide to formatting an ATA hard drive with a Macintosh operating system(Mac OS).

  • Mac OS 8.x thru 9.x
  • Mac OS X or 10

Formatting an ATA hard drive in Macintosh operating system 8.X thru 9.X

Step1.
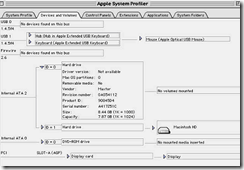
After hooking up the hard drive either boot off the CD or the main Macintosh HD then go to the Apple System Profiler located under the Apple menu. From there go to Devices and Volumes and check to see if the hard drive that is going to be formatted is properly displayed. If the drive is not displayed make sure that the drive is properly installed or connected.

Format hard drive using Mac OS

Step 2.
Once the drive is detected and determined to be the one that is to be formatted go to the System Folder, Utilities, Drive Setup, and ‘click’ on the “Drive Setup” icon.
Format hard drive using Mac OS

Step 3.
‘Click’ on the drive you want to format then ‘click’ Initialize.
Format hard drive using Mac OS

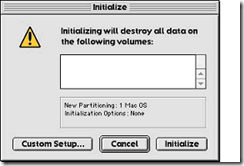
‘Click’ either on Initialize for a single volume format or ‘click’ on Custom Setup to specify type of format, partition, and size. For Custom Setup instructions go to Step 4.
Format hard drive using Mac OS

Step 4.
In Custom Setup select the Partition Scheme, the type of format, and the size. Then ‘click’ on OK.
Format hard drive using Mac OS

Step 5.
This will then take you to the Initialize screen. ‘Click’ on initialize. After the drive initializes it will be ready for use.
Format hard drive using Mac OS

Step 6.
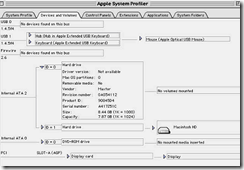
To verify that the system recognizes the correct partitions, size, and format go back to Apple System Profiler and select the Devices and Volumes folder. Check the information from the pull downs.
Format hard drive using Mac OS

To format the drive for Mac OS X (Jaguar, Panther and Tiger)

Note: The way in which Mac OS X mounts the hard drive depends on the drive’s capacity.

Step 1. Plug your drive into the Macintosh.

Step 2. Launch the Disk Utility.
Format hard drive using Mac OS

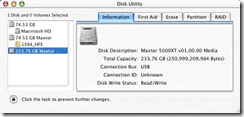
Step 3. Select your new drive from the list on the left. A description of the drive appears in the right window.
Format hard drive using Mac OS

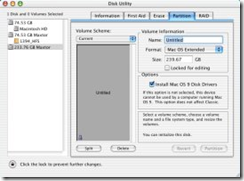
Step 4. Select the Partition tab at the top of the window.
Format hard drive using Mac OS

Step 5. You may partition the drive or just keep it to one volume. For each volume:.

  • Enter a name for your drive in the. Name field.
  • Select the Mac OS Extended from the Volume Format drop-down list.
  • Select the check box next to Install Mac OS 9 Drivers. This will allow your disk to be recognized if you start your system with Mac OS 9.
  • Click Partition to continue. An alert dialog appears to confirm the Partitioning/Formatting process.
    Format hard drive using Mac OS
  • Click Partition to start the Partitioning/Formatting process.
    Format hard drive using Mac OS
  • When complete, the drive will mount to the Desktop.
Read More

Can I use DiscWizard to setup my Seagate external hard drive?

DiscWizard DiscWizard can be used not only to format ATA and SATA drives, but external Seagate drives connected to the computer through USB, Firewire, or eSATA as well.  Though the setup procedure is almost the same as that used with internal drives, you want to be aware of a few of things:

  1. Unlike previous versions of DiscWizard, in addition to being able to use DiscWizard for Windows to set up an external hard drive, you can now also use the bootable version of DiscWizard for the same purpose.
  2. The external drive(s) can be identified by its interface type, which is listed in the “Interface” column of the Add New Disc Wizard.
  3. DiscWizard can only be used in Windows 2000, XP, and Vista.  For Windows 98 and Me, you will need to use FDISK and FORMAT instead.
  4. Because their connections have slower sustained transfer rates than internal ATA and SATA connections, partitioning and formatting USB and Firewire hard drives may take longer than usual.
  5. All other step are the same that you would see when preparing an internal hard drive.
Read More

Volume Size Too Big Error During Windows XP Installation

Volume Size Too Big Error Why do I get a “Volume size too big” error message during the installation of Windows XP?

You cannot format a volume larger than 32 GBytes in size using the FAT32 file system during the Windows XP installation process. Windows XP can mount and support FAT32 volumes larger than 32 GB (subject to the other limits), but you cannot create a FAT32 volume larger than 32 GB by using the Format tool during Setup. If you need to format a volume that is larger than 32 GB, use the NTFS file system to format it. Another option is to start from a Microsoft Windows 98 or Microsoft Windows Me Startup disk and use the Format tool included on the disk.

Read More

Format a hard drive without using FDisk

Format A Hard Drive STEP ONE
You first need to decide what operating system you intend to load after formatting the hard drive. It is best and easiest to use a boot disk for that Operating System, such as MS Dos6.2 or Windows95b or Windows98SE. You will need the proper Windows95/98 boot disk in order to load the these operating systems on the computer, else it will reject loading due to the wrong Operating System on the computer.

STEP TWO
Insert your boot disk in the floppy drive and start the computer. Once the system has completed booting and an A: prompt appears we are ready to start.

Type: format C: /s [press Enter]

This statement tells the system to format your “C” drive and when it is finished to copy the system files to the drive, (the /s switch for ‘System’). You can format a different drive this way by using a different drive letter.

Format should display: WARNING, ALL DATA ON
NON-REMOVABLE DISK DRIVE C: WILL BE LOST!
Proceed with Format (Y/N)? Type [Y] [Press ENTER]

Your screen should display the size of your drive and a countdown in percentage of formatting completed. Depending on your computer’s speed and the size of the drive it can take from a few minutes to over 15minutes.

STEP THREE
When it reaches 100% complete, you will see a new message:
FORMAT COMPLETE. SYSTEM TRANSFERRED.

This indicates that the files required to boot your computer from the hard drive have been copied from the floppy to the hard drive. The computer can now boot from the hard drive without a boot disk in the floppy drive.

You will see one last message:
Volume label (11 characters, ENTER for none)?
Type anything you like or leave it blank – [Press ENTER]

You can now begin to load your Operating System.
Special Note:
You may receive the error message:
“insufficient memory to load system files”

This is caused by the lack of a memory manager loaded at boot and your PC can only access the first 1mg of ram memory. There are two possible solutions:

1) Omit the /s switch when formatting. This is done by typing this:
FORMAT C: [press enter]

Then when the format is complete, manually add the system files to your hard drive by using this command:
SYS C: [press enter]

2) You will need to load a memory manager in order to overcome this issue. Not knowing what operating system boot disk you are using is an issue here. However, Windows98 boot disks load a memory manager, so let us assume it is either Windows95 or earlier.

You need to add the file HIMEM.SYS to your boot disk and then modify your Config.sys file on the boot disk.

Download Himem Here

and add this line in the Config.sys, (make this the first line):
DEVICE=himem.sys

Now, reboot your computer with the boot disk and it should work fine.

You will find that the boot disks we offer for download are all configured with a Memory manager and contain the file: HIMEM.SYS

Read More

How to partition, format, or reformat an internal or external drive on Mac OS X 10.4?

Please follow the steps below to format hard drive:

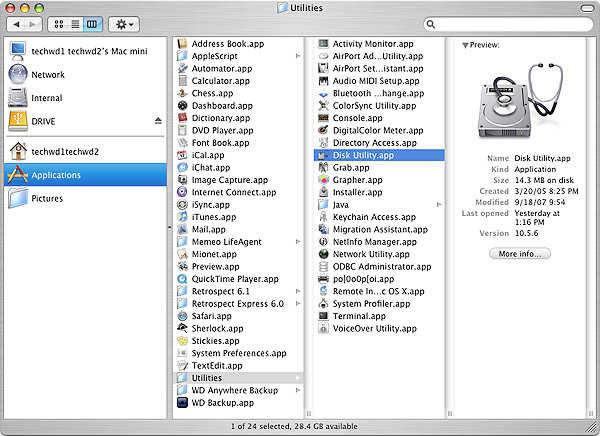
1. Double left-click on your Internal Mac drive and choose Applications -> Utilities and double-click on Disk Utilities.

format hard drive

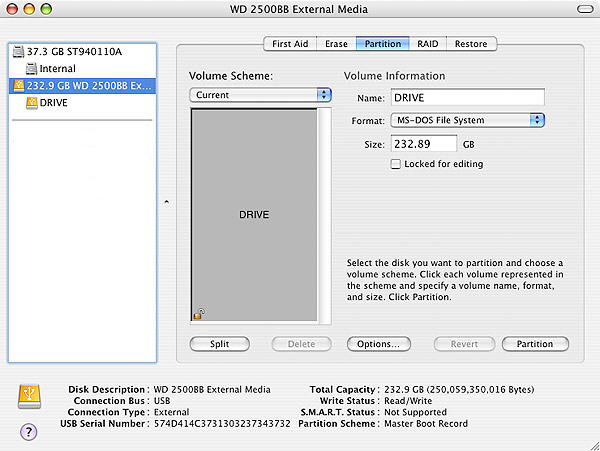
2. In the far left pane, choose the drive that you want to partition and format. Typically there are two listings for each drive unless you have more than one partition on a particular drive. Choose the drive listing that is farthest to the left for the drive that you want to format. It is usually directly above the name of the drive.

format hard drive

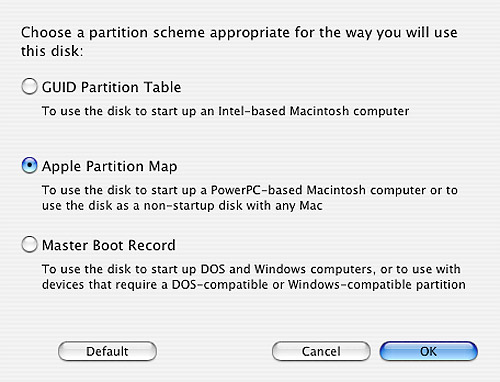
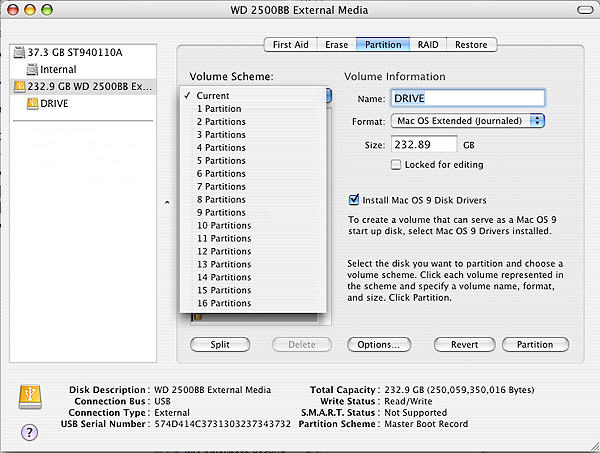
3. Click the Options button and choose Apple Partition Map. Then click on Ok.

format hard drive

Note: If you cannot choose Options because it is grayed out, click on the Current dropdown menu and click on 1 partition. This should make the Options button useable again. Also, if you receive an error that the drive cannot be unmounted, shut down the Mac, unplug the drive from the Mac, turn you Mac back on and when it is fully loaded to the desktop, connect the drive and try again from Step 1.

format hard drive

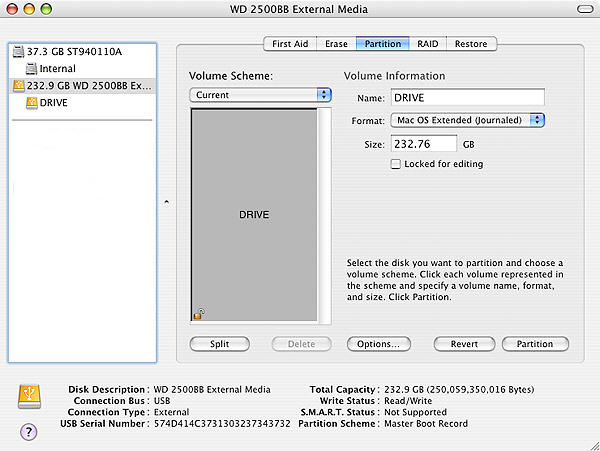
4. Change the Format to Mac OS Extended (Journaled). You can also give the drive a name by typing it into the Name box. When you are done, click on Partition.

Partition hard drive

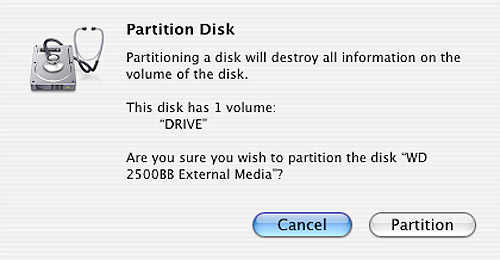
5. A box will come up letting you know that formatting and partitioning the drive will erase all of the information that is on the drive. If you don’t need any of the information on the drive, then click on Partition.

Partition hard drive

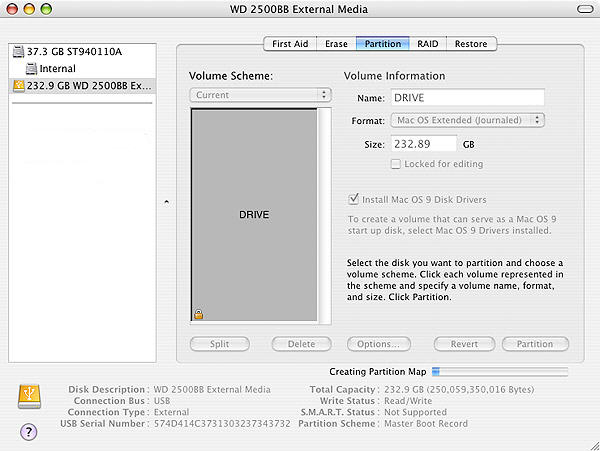
6. The drive is now formatting and you will see a status bar at the bottom that says Creating Partition Map. When it is done, this bar will go away and the drive should now show up on your desktop.

Partition hard drive

Read More