Intel RAID Controller Troubleshooting Guide: Overview
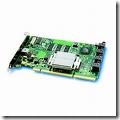
Intel Raid Controller In the unlikely event you encounter issues, this guide will help you troubleshoot and identify possible problem areas. If you are unable to resolve a problem using this guide, please follow these steps:

1. Visit http://support.intel.com/support/motherboards/server and choose the model of the
RAID controller you are using. This site will contain the latest information of known
issues and solutions.

2. If you are unable to resolve the issue, send an e-mail to Intel Customer Support using
this form: http://support.intel.com/support/motherboards/server/server_form.htm

3. Contact Intel Customer Support using one of the numbers listed here:
http://www.intel.com/support/9089.htm

This guide will help you collect the data we will need to help you resolve your issues. Each
issue includes suggestions that may help you, and a list of information we will need to know you if you need to call us. Please visit the Intel Support website for updated versions of this
document at http://support.intel.com/support/motherboards/server
Server boards, RAID controllers, and many other computer devices use programmable flash
memory parts to store BIOS or firmware code. Please visit the support site for your server
board and the RAID controller you are using and download and install the latest BIOS and
firmware for the server board and RAID card. Intel® server board and RAID card downloads
can be found at: http://support.intel.com/support/motherboards/server.

Your Intel® RAID Controller may include several LEDs that can aid in troubleshooting your
system. Please refer to your specific RAID controller’s documentation for location and purpose
of the LEDs. These LEDs may signal the following events:

• Indicate that the controller is online (i.e., installed correctly).
• Indicate that the controller is in Firmware Recovery Mode.
• Indicate activity on the SCSI Channel.
• Indicate Bus Master DMA transfers.

These LEDs may be referred to later in this document. In addition, the controller may emit a
series of beeps. Refer to your specific RAID controller’s documentation for definition of the
beep code. These beep codes may signal the following events:

• State of the controller upon boot-up.
• A change in the state of an array.
• A change in the controller’s environment status (during normal operation).
• A hardware failure.

A series of beep codes may be audible during POST or during RAID array event. Some RAID
controllers
emit a 1-3 beep code during POST, signifying normal operation. The server board
or other add-in peripherals may also emit beep codes. Refer to the documentation for your
RAID controller, server board, or add-in components for specific beep code information.

Troubleshooting Overview

Intel® RAID Controller Troubleshooting Guide
1. My server will not power on
2. Upon booting, my server starts beeping
3. My system appears to power on, however there is no video
4. Some of my hard drives show up during POST and some do not
5. My RAID controller has an issue not addressed above

Additional Questions and Answers
1. How do I update the firmware?
2. I am unable to complete the firmware update, I get a message that the firmware is intact or the system hangs during when entering StorCon
3. I do not see the zero channel RAID card / Modular RAID on Motherboard (MROMB) card during POST
4. How do I disable the integrated components

Read More

Intel RAID Controller: unable to complete the firmware update

I am unable to complete the firmware update; I get a message that the
firmware is intact or the system hangs during when entering StorCon

As the BIOS on server boards and RAID controllers are updated, it is possible that some
combinations of RAID controller BIOS and server board BIOS do not work together so that
updating RAID controller firmware through the normal update process is not possible. A
firmware recovery process is described here with an override that makes it possible to force the firmware update.

To force a firmware update, complete the following steps:

a. Move the recovery jumper on the RAID card to Recovery position.

b. Download the firmware recovery utility and update code from the website, or make a
firmware recovery diskette from the CD and boot to it.

c. Choose option 2, recover firmware.

d. The system creates a RAM drive and begins copying files to it. Press <Ctrl> <C> when
you see the prompt, “press CNTL C to interrupt the recovery process”. You will be
brought to a C: prompt.

e. Type “FRU -O” to force overwriting the firmware. (Note: “O” is the letter O for Overwrite,
not the number zero)

f. Indicate agreement at the following two prompts.

g. Green text will display at the top of the screen indicating that the recovery has started.
This will be followed shortly by text that provides the version (flashing) that is being
forced. The first few digits of this text are the firmware version number followed by
digits that refer to the build number.

h. When complete, replace the jumper into the normal position and reboot.
Troubleshooting Guide

Read More

Intel RAID Controller: How do I update the firmware?

Firmware can be updated through StorCon. StorCon can be activated a number of ways, including through XROM during POST by pressing <Ctrl> <G> when prompted. Complete instructions for each update method are included in the hardware guide for the RAID controller.

Refer to the resource CD that accompanied the product or to the support website listed above.

A short list of steps to update the firmware using the XROM method is included here:
Follow the procedure below to update the firmware via the XROM version of StorCon:

a. Download the firmware image, SRC_RXFW, that contains the latest programs and
drivers from the website.

b. Format a 3.5″ HD disk (1.44MB) and copy the SRC_RXFW file onto the disk.
c. With the adapter installed in the system, boot the computer and press <Ctrl> <G> when
prompted. This initiates the BIOS version of StorCon.

d. Select the applicable RAID controller and press <Enter>.

e. If the Express Setup menu is displayed, press <F4> to display the Advanced Setup
menu. Select the menu option “Configure Controller” and press <Enter>. Insert the
floppy containing the latest firmware file into the floppy disk drive.

f. From the “Configure Controller” submenu, select “Firmware Update” and press <Enter>.

g. StorCon automatically searches for the firmware file from the floppy drive, A:\. After
finding the file, StorCon displays the name, description and version of the firmware.
Press <Enter>.

h. StorCon reads and checks the firmware file, then displays a warning. Press <Y> to
confirm the firmware update.

i. StorCon programs the flash eprom.
Warning: Do not interrupt the update process. If interrupted the firmware image in the
Flash may be damaged. If the firmware is interrupted, follow the firmware recovery process
instructions in the next section.

Troubleshooting Guide
12 Revision 1.0

j. After StorCon indicates that the update is complete, press any key.

k. The focus returns to the Configure Controller submenu. Press <Esc> several times to
close the menus and press <Y> to quit StorCon.

l. StorCon detects the firmware update and requires a system reboot. Press any key to
reboot.

When the update process has completed, reboot the computer for the change to take effect.
During the boot, the system displays the updated firmware version. You can also relaunch
StorCon and select the applicable RAID controller to view its new firmware version at the
bottom of the console (for example, FW:2.34.yy-Rzzz).

You can also use the operating system version of StorCon to update the firmware. Refer to the
Storage Console chapter of the Software Guide for details.

Read More

Intel RAID Controller Troubleshooting Guide: My RAID controller has an issue not addressed above

Check the following:

• Update the firmware files to the latest version. The files required depend of the server
board, but may include BIOS, BMC, FRUSDR, HSC. Clear the CMOS upon completing
any updates. Update the RAID controller to the latest version of firmware. Update files
can be downloaded from http://support.intel.com/support/motherboards/server.

• Download and apply the latest drivers used for your installation. These drivers may
include video, network adapter, SCSI, ATA RAID, chipset, and operating system drivers.

• Confirm that the processor(s) was installed correctly. If a single processor is installed, it
must be in CPU socket 1. When more than one processor is installed, they must be of
the same speed and voltage (and within one stepping). Do not attempt to overclock the
processors or other components on this system. Overclocking is generally not possible
and may damage components and void the warranty of your server board or other
components.

• Confirm that the memory is properly seated and that both the server board and RAID
controller memory is listed on the tested memory list.

• Calculate the power budget to ensure sufficient power is supplied. Power budget
information is usually included in the server board product guide or the technical product
specification. Information about the RAID controller power-draw is available in the RAID
controller hardware guide and is also available at
http://support.intel.com/support/motherboards/server.

• Verify that all chassis, power supply, and processor fans are properly installed and
functioning. If installed in a third-party chassis, verify that sufficient cooling is available.

• When using multiple PCI adapter cards in a PCI riser with more than one slot, populate
the slots from the bottom up. On systems without a PCI riser, see if your results vary by
moving the RAID controller to a different slot.

Read More

Intel RAID Controller Troubleshooting Guide: Some of my hard drives show up during POST and some do not

Drives not showing up in post can be caused by a variety of problems. Please check the
following:

• Are you using the latest BIOS and firmware for the server board and the latest firmware
for the RAID card?

• System memory limitations limit the number and size of option ROMs that can be used
in the system. If you place too many adapters in the system, or the ROMs on the
adapters you have installed take up too much space in memory, the option ROM on
your RAID controller may not expand correctly and will not show the hard drives that are
connected to it. Try turning off the expansion ROMs for any on-board device that is not
being used. For example, if your server board includes a SCSI controller that is not
being used, disable this SCSI controller in BIOS setup. For a list of tested peripherals
with the Intel RAID controller, download the Tested Operating System and Adapter List
from http://support.intel.com/support/motherboards/server.

• If you are using a Zero Channel Card that utilizes the on board IO controller, such as an
on-board SCSI or Serial ATA controller, the Option ROM scan for the on-board device
must be enabled. If it is not enabled, drives connected to that device will not show up
during POST.

• Confirm that the drive power cables are firmly connected. If you are using a chassis
with a backplane, make sure the power and SCSI cables are properly applied to the
backplane and the hard drives are firmly seated in the backplane.

• Check your SCSI ID numbers. SCSI devices must each have a unique ID on the SCSI
bus. This number is set with jumpers on the device. ID numbers should be set starting
at 0 and they must be set lower than 8 if booting from the drive. If you are using a
server chassis with a backplane, the device IDs are usually automatically set by the
backplane, but may be manually configurable.

• Check for proper termination on the SCSI bus. Intel RAID cards are by default autoterminating.

If your hard drives still do not show during post, please call your customer support
representative. Note the following information and have it ready to assist the support engineer:

• Model number and firmware revision of the RAID controller you are using.
• Manufacturer and model number of other add-in adapters installed in your system.
• Manufacturer and model number of hard drives installed in the system.
• Identify the type of termination used for the card.
• The SCSI IDs of the devices on your SCSI bus.
• The number and type of SCSI channels.
• Manufacturer and model of the memory used in the system and on the RAID controller
and whether it is on the tested memory list.

Read More

Intel RAID Controller Troubleshooting Guide: My system appears to power on, however there is no video

Check the following:

• Look for a blinking cursor in the top left corner of the screen. If the cursor is there, wait
5 minutes to determine if the system will continue the boot process.

• Your RAID controller may require the addition of a memory module. Verify that the
module is included on the tested memory list for the RAID controller. The tested
memory list is available at http://support.intel.com/support/motherboards/server.
Remove and reseat the memory module if memory on the card is installed in a memory
socket.

• Remove all add-in cards, including the RAID controller. See if the server boots using
only the on-board components. If successful, add the cards back in one at a time,
rebooting between each addition. This will help you determine the card that is causing
the problem.

• Listen for any beep codes and refer to your product documentation. A 1-3 beep code
from the RAID card indicates normal operation.

• Make sure the monitor is turned on and the video cable is plugged in completely. If you
are using a switch box to share a monitor between multiple servers, make sure you have
the switch set to the correct server.

If you are unable to resolve this issue, contact your customer support representative. Gather
the following information before making your phone call:

• The make and model server board and RAID controller are you using.
• The version of BIOS and firmware of the server board.
• The version of the firmware on the RAID controller.
• The PBA (Product Board Assembly) number on the board.
• The chassis and power supply the server is using.
• Note what is displayed on the monitor or any sounds emanating from the server system.

Read More

Intel RAID Controller Troubleshooting Guide: My server will not power on

intelraidcontroller Though it is unlikely that a server will not boot, the following are some of the possible reasons for failure to boot:

• Some ATX power supplies have a power switch on the back of the power supply next to
the fan. Is this switched on?

• Check for proper power cord connections. Some chassis allow the use of two power
cords and the system will not power on when a single cord is used and is plugged into
the wrong connector.

• Your RAID controller may require the addition of a memory module. Verify that the
module is included on the tested memory list for the RAID controller. The tested
memory list is available at http://support.intel.com/support/motherboards/server.
Remove and reseat the memory module if memory on the card is installed in a memory
socket.

• Remove all add-in cards, including the RAID controller. See if the server boots using
only the on-board components. If successful, add the cards back in one at a time,
rebooting between each addition. This will help you determine the card that is causing
the problem.

• The Intel RAID Controller requires additional power to run. Although the amount
required is minimal, it may cause the system to exceed the power available from the
system power supply. Failure to provide the correct power supply or sufficient output
from the power supply may result in a failure of the system to power on. Refer to the
server board’s Technical Product Specification to calculate the necessary power budget
for all installed devices that draw power. These devices may include the memory, disk
drives, and add in cards. Verify sufficient power exists to run the system.

• Examine the LEDs on card and compare them to the product documentation to
determine if the LEDs give an indication of the failure.

• Compare any RAID card beep codes to the codes outlined in the product documentation
to determine if the beep codes you hear give any indication of the failure.

If you are unable to resolve this issue, contact your customer support representative. Gather
the following information before making your phone call:

• The make and model server board and RAID controller are you using.
• The version of BIOS and firmware of the server board.
• The version of the firmware on the RAID controller.
• The PBA (Product Board Assembly) number on the board.
• The chassis and power supply the server is using.
• Note what is displayed on the monitor or any sounds emanating from the server system.

Read More