Fix MBR in Windows XP and Vista By Yourself
What is the MBR?
 A master boot record (MBR), or partition sector, is the 512-byte boot sector that is the first sector (“LBA Sector 0”) of a partitioned data storage device such as a hard disk. (The boot sector of a non-partitioned device is a Volume Boot Record. These are usually different, although it is possible to create a record that acts as both; it is called a multi boot record.) The MBR may be used for one or more of the following:
- Holding a disk’s primary partition table
- Bootstrapping operating systems, after the computer’s BIOS passes execution to machine code instructions contained within the MBR
- Uniquely identifying individual disk media, with a 32-bit disk signature; even though it may never be used by the machine the disk is running on
If, for any reason, the MBR becomes damaged or corrupt, then the operating system will be unable to load. You will normally see error messages like:
- Error loading operating system
- Missing operating system
- Invalid partition table
These messages are definitely not fun, especially if you are not familiar with computers. Most people would automatically assume their computers are dead! However, that’s not true. Being in IT myself, these errors are actually preferably to other types of Windows errors. Why?
Well, it’s actually fairly easy to fix the Master Boot Record in XP and Vista. All you have to do is load up the Recovery Console and run a simple command. All of your data, applications, settings, etc are still intact on the drive and once the MBR is fixed, the computer will load normally.
So how can you repair your damaged MBR?
Here are the steps to follow:
1. First, restart your computer with the Windows XP setup disk in the CD drive. If you don’t have your original disk, borrow one or download a ISO image from a torrent site.
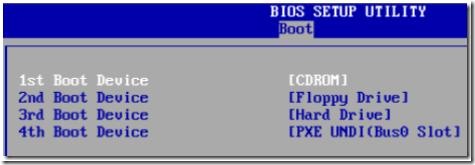
2. When prompted, boot from the CD drive by pressing any key. If Windows loads automatically, you will first have to enter the BIOS setup and change the order of the boot devices to start with the CD drive.
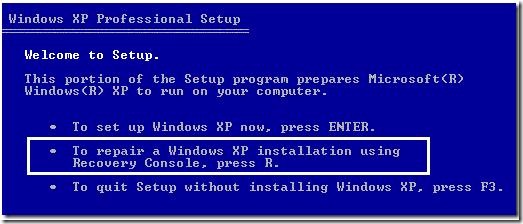
3. Once the setup loads, you will see the option to press R to repair a Windows installation.
4. Once the Recovery Console loads up, you will have to type in a number that corresponds to your Windows installation. This is normally just 1. Press Enter and then type in the Administrator password.
5. Now at the prompt, type in fixmbr. Your damaged MBR will now be replaced with a new master boot record and your computer should now be able to boot properly. Note that you may also want to run the fixboot command to repair the boot sector with a new one.
Also, make sure you only use these commands on a system with one operating system installed. If you have more than one operating system installed, fixmbr and fixboot could mess up everything.
Fix MBR in Vista
In Vista, the procedure to fix the master boot record is a bit different. You have to start up Vista in the Recovery Environment and then run the bootrec command. Here’s how.
1. First, load up the Windows Vista disc in your drive and press any key to boot from the disc.
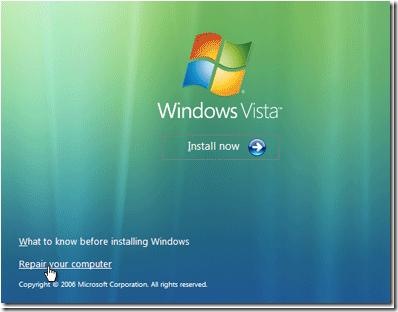
2. Choose the language, time, currency, etc and click Next. Now click on Repair Your Computer.
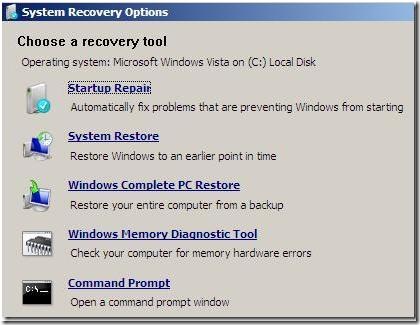
3. Choose the operating system to repair and click Next. When the System Recovery Options dialog comes up, choose the Command Prompt.
4. Now type bootrec.exe and press Enter. This will rebuild the boot configuration data and hopefully fix your problem. You can also run the command with switches to fix just the master boot record (/fixmbr), the boot sector (/fixboot), or rebuild the entire BCD (/rebuildbcd).
Fix MBR on Windows 7
1. Insert Win 7 installation DVD and boot from DVD drive. While in some older systems you may have to change boot order through system BIOS, most newer systems allow booting from DVD without changing boot order by simply clicking on any key when prompted to doing so.
2. Choose your default “Language”, “Time”, and “keyboard Input” on the first window and click next.
3. You’re now presented with 3 choices. Click on “Repair Your Computer” to gain access to the System Recovery window. Now choose “Command Prompt” in order to run the desired utility which is called “bootsect.exe”. Bootsect is located inside the boot folder so change your directory to boot. Now run “bootsect /nt60 C:\” if you had Win 7 initially installed in the C partition. Alternatively, you can run “bootsect /nt60 SYS” or “bootsect /nt60 ALL” to repair the system partition or all partitions. Eject the DVD, and restart computer. Your computer should now boot Win 7 again.

